
The Overthinker’s Guide To Buying A Woven Wrap
Looking to purchase a woven wrap, but confused in a sea of information online? Yup, I get you. It took me forever to understand what size I wanted to buy. Allow me to pass on my knowledge to you, and save you the time!
Wrap Sizing

Woven wraps come in sizes 1–8 (and sometimes 9), with 1 being the shortest (often used for torso or sling-style carries) and 8 being the longest — a whopping 5.7 m. You’ve likely seen size charts online that match wraps to shirt sizes; those are pretty useful, honestly. It’s really easy to overthink wrap sizing, so my general advice is to keep it simple 😂. If you’re neurodivergent like I am, though, you might prefer to plan every detail — so let’s think it through together!
The BASE SIZE
First off, we need to determine our Base Size. This is the minimum length of wrap required by you to accomplish a basic Front Wrap Cross Carry (a.k.a FWCC). In order for carry tutorials to apply to folks of all body sizes, the length required for any given carry is usually expressed as relative to the Wrapper’s Base Size. i.e. “Base Size - 1” or “Base Size +2”. So for example, my own base size is 6. Many of the carries I knew I wanted to do require a Base +1. Therefore, my main and favourite wrap is a size 7. I’d rather have to do an extra pass or two to use up tail length, than having too short a wrap.
How to find your base size
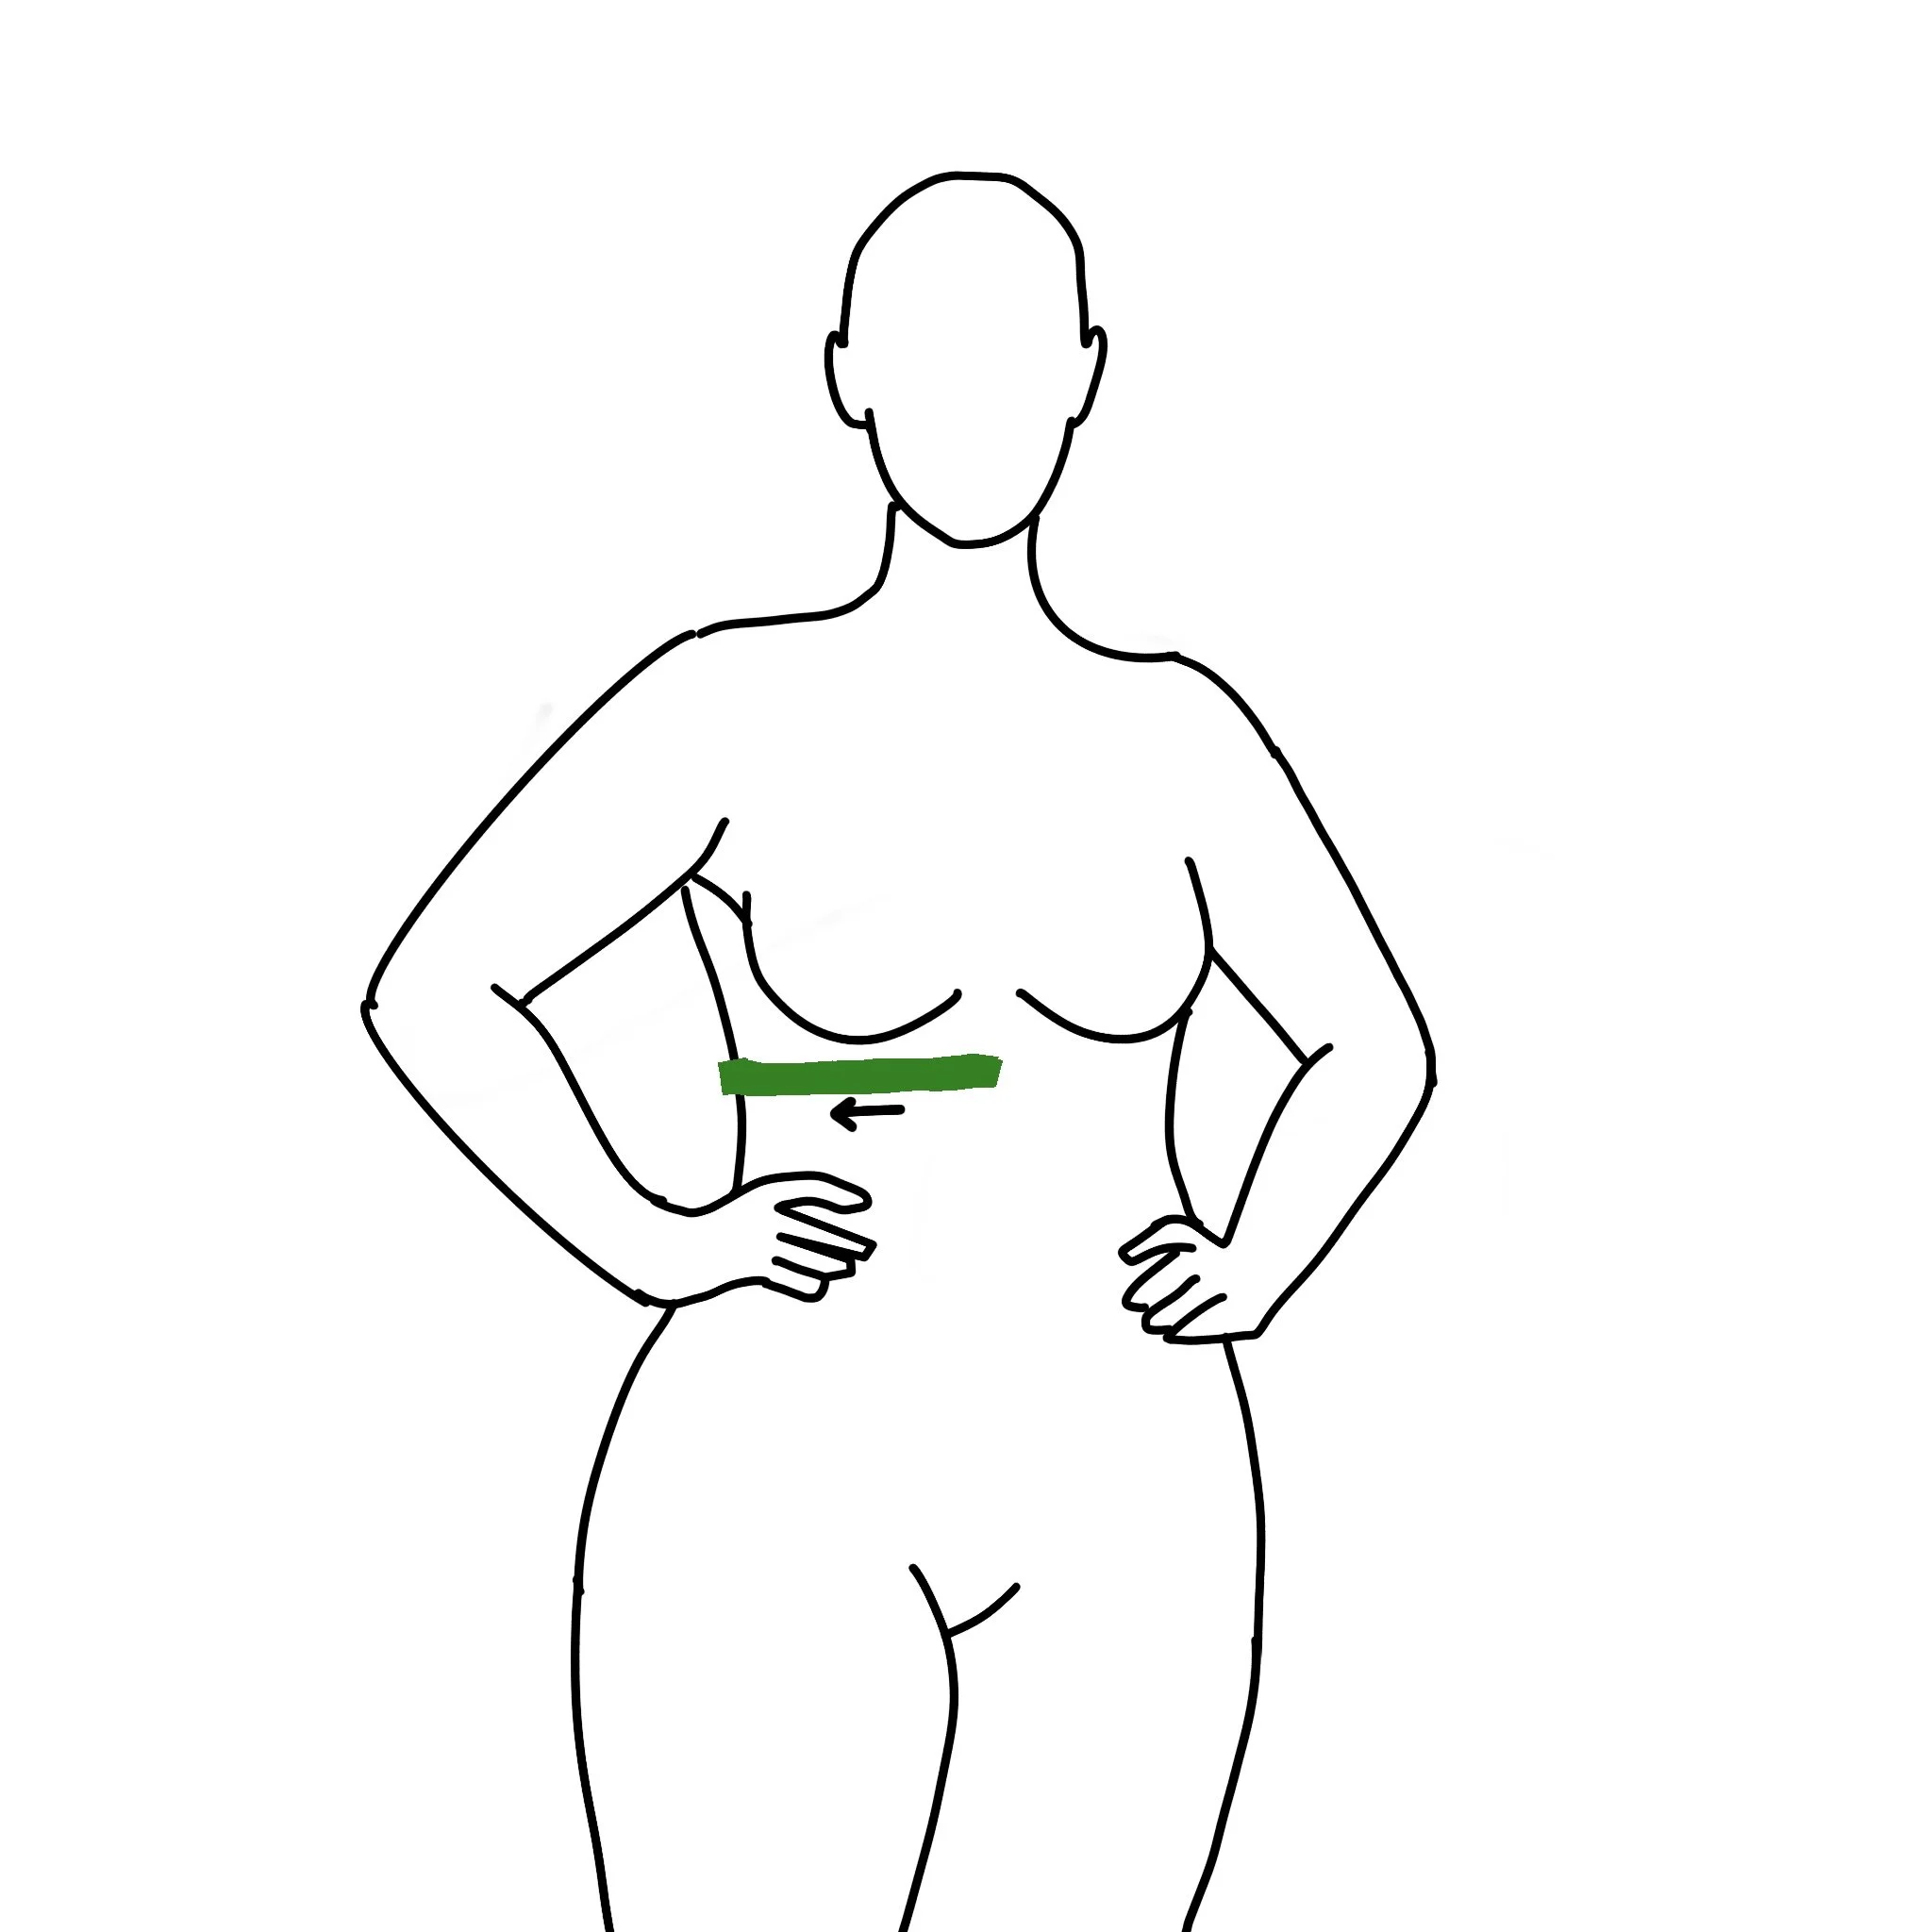
If you want to be more precise than a T-shirt sizing chart, use this masking tape method.
You need: a roll of masking tape, a measuring tape of some kind. I used a sewing tape.
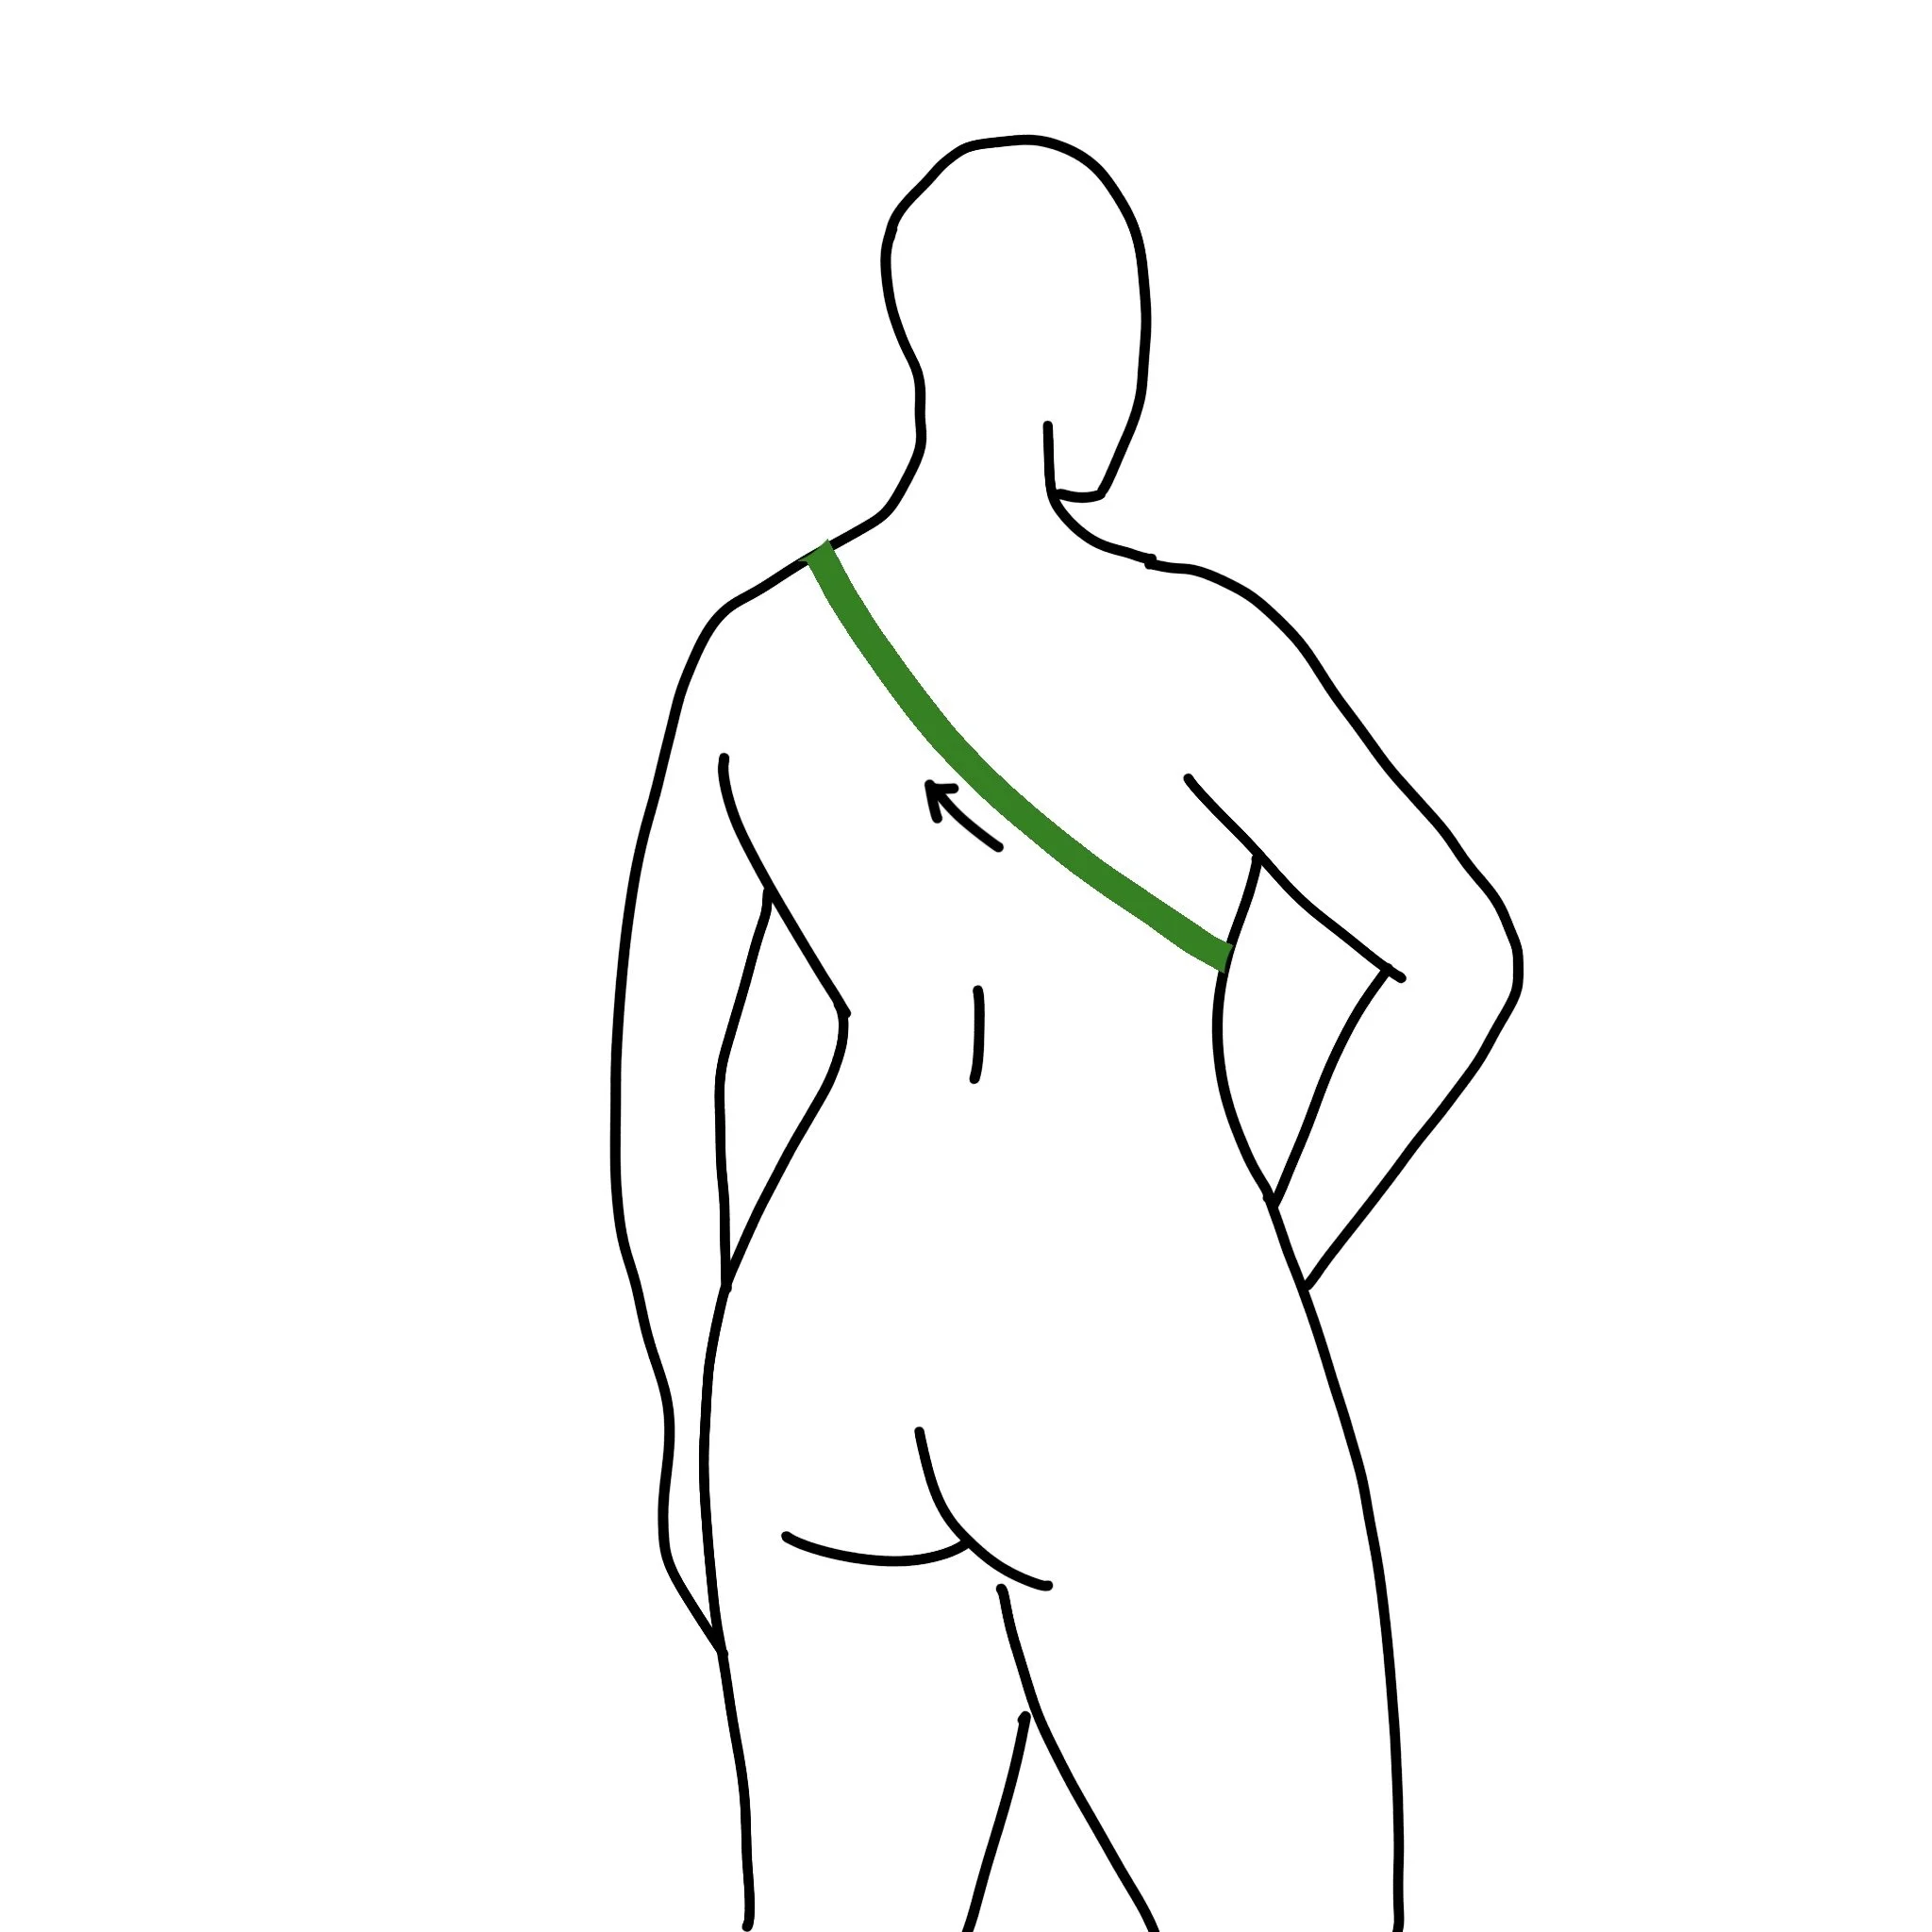
OVER YOUR CLOTHES: Start the masking tape at the base of your sternum. Tape from sternum to outside of ribcage. Bring the tape under your arm and across your back, up over your opposite shoulder. Tape from your shoulder down the level of baby’s bum, curving slightly inwards. From there, tape directly across your torso again (the same direction as we started with). Then around to the middle of your back. Add enough length for you to tie a double knot.

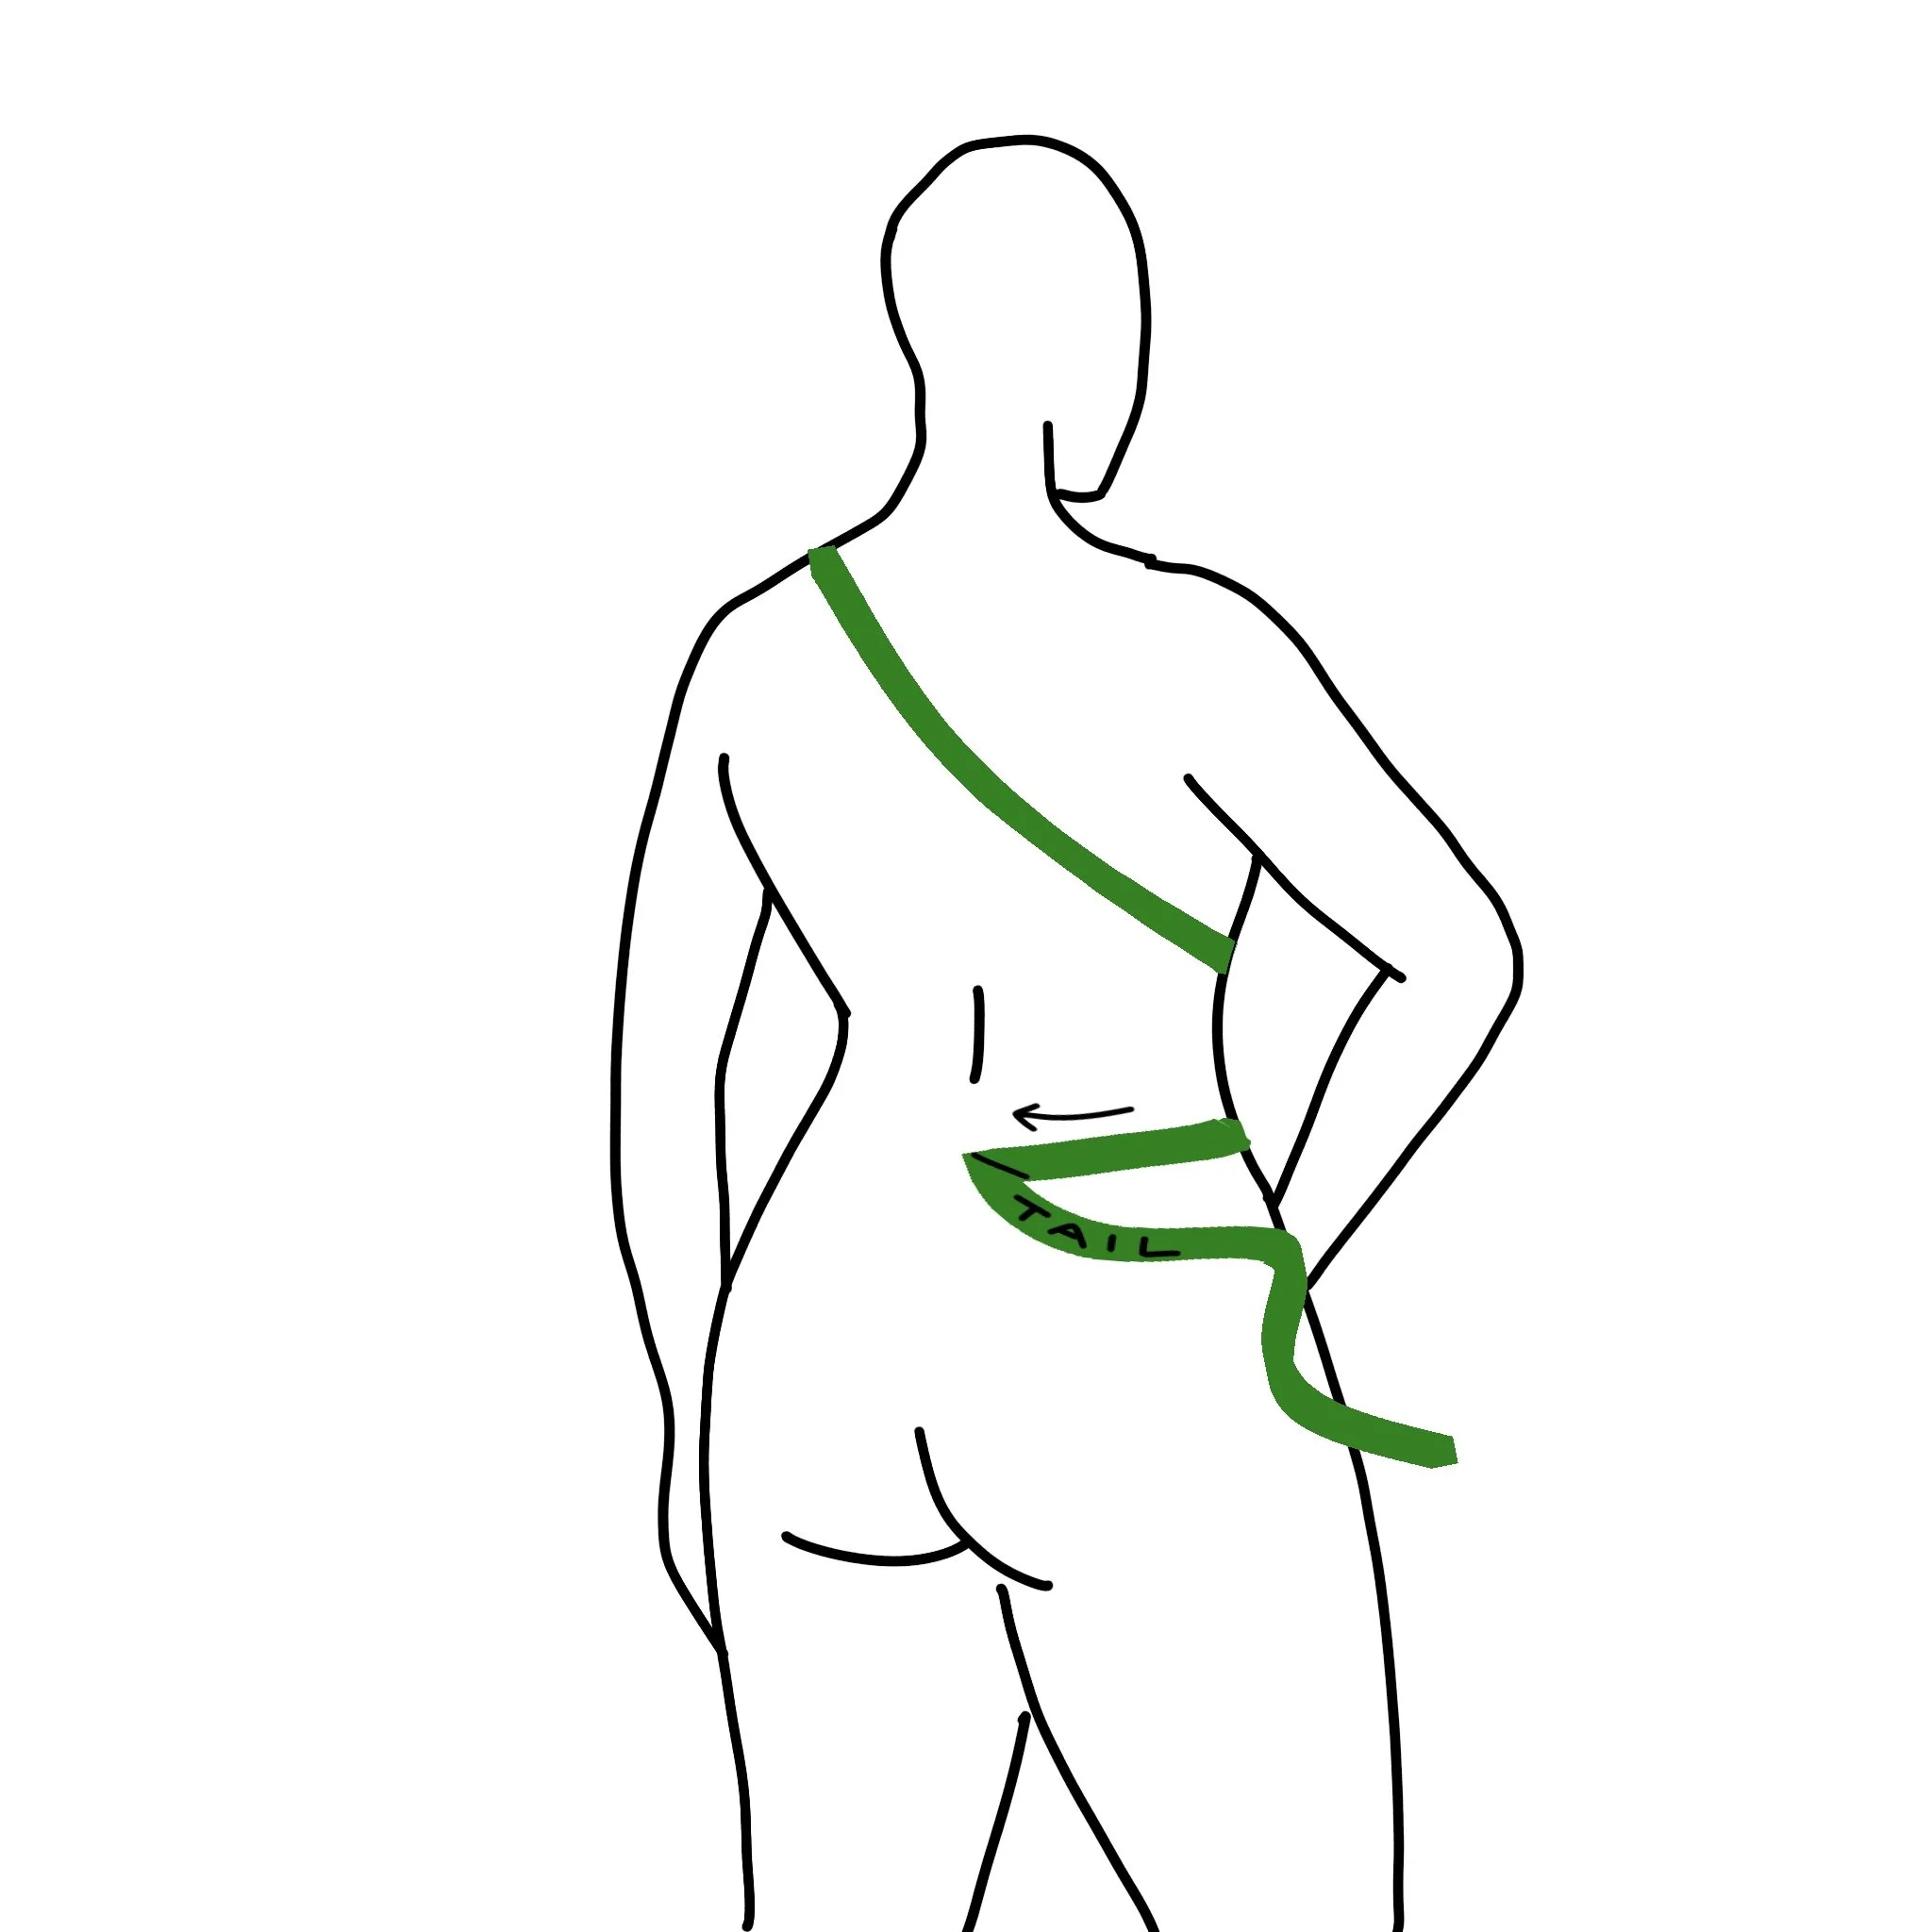
Now. Carefully untape yourself and measure the length of the tape. Now double that number. That length is your base size.
When I did this, my tape length was 219cm. Doubled is 438cm = 4.4m; round up instead of down = size 6 (4.6m)
Other Sizing Considerations
Once you know your base size, here is what you need to ask yourself:
After looking at tutorials online, is any particular size jumping out at me? For myself, I looked at a bunch of tutorials and the ones I mostly wanted to do required a Base +1.
Are you wrapping a baby that’s older than a year? If you’re wrapping a large baby or toddler, you might want to size up.
If you are very tall, you might want to size up.
Will you be sharing this wrap with someone else whose base size is longer? Check out their base size before you order, and remember that the smaller-bodied wrapper can always add additional passes with the wrap to keep the tails off the floor.
You wanna do those fancy finishes you see online? Size up once or even twice.
Wrap Thickness
For the purposes of this guide, I’m not going to refer to any specific GSM (the measurement of thickness of fabric - grams per square meter). I’ve already done that bit of overthinking for you. You want a thinner wrap. Just trust me on this. If you get to touch before buying, feel the thickness of the tails in your hands. Does this feel like you can tie a double knot in it … behind your back?
Why do I recommend a thin wrap? Because thick wraps are a bitch to tie. That’s it. Thicker wraps are available on the market and they are supposed to be more supportive when carrying older kids. However, I personally don’t think the tradeoff is worth it. I have a couple of thick wraps, and when I double-knot them, the knot is almost the size of my head. If you can tolerate a knot of that size on your body, more power to ya, but I HATE IT.
Wrap Design
I regret to inform you of this, but the cute-patterned wraps made with Jacquard weaving - usually reversible too - tend to be thick and hard to tie. I know. I still want to add one of those cute Lord of the Rings wraps to my collection, but for a first wrap? Don’t do it.
Not only are the cute-design ones hard to tie, but they don’t behave as uniformly as a plain weave. A plain weave is way better at creating tension lines as you do strand-by-strand tightening.
Don’t be fooled by the word “plain” here, many plain-weave wraps have changing colours along their length (the WARP threads create different-coloured stripes). And I absolutely do recommend getting yourself one where one of the long sides is a different colour from the other long side. This really helps when you’re wrapping to know which rail (the long-hemmed edge) to pull to tighten.
Did I just break your heart because you had your sights set on a patterned wrap? I also think it’s important that you get one you really like! If you can try it before buying it, and you feel comfortable pleating and double-knotting it, Get that wrap!
Buy Second Hand!
Buying woven wraps second hand is a great way to get a wrap that is already broken in, and therefore not kind of crunchy for the first little while you use it. You can also ask the seller about the thickness before buying. If you’re going to join the online BST groups though … be warned … you will want to buy so. many. things.
—
And there you have it! I hope this gives you the guidance needed to decide what size and kind of wrap you want to buy.